Better Sound Quality in Debian 12

Debian 12 “bookworm” comes with a new and improved sound server called PipeWire. It brings noticable sound quality and latency improvements over PulseAudio. Here is an article describing the differences in detail.

Although PipeWire is a huge improvement, under the hood the new sound server still relies upon ALSA which is a kernel-level API for handling sound in Linux. Out of the box, ALSA defaults to a sample rate of only 48000Hz. Most people won’t notice, but for users who really care about sound quality, this is not acceptable. The majority of modern sound hardware (DACs in particular) are capable of much more.

Here are the steps to take if you want to fix this and improve your Linux sound quality experience.

First, we need to determine your sound card’s capabilities. This is how you list all of your audio devices on your computer:

$ aplay -l
...
card 1: Audio [VIA USB Audio], device 0: USB Audio [USB Audio]
  Subdevices: 1/1
  Subdevice #0: subdevice #0
...

If this is your sound card, you would be using card 1, device/stream 0. Use the following commands to determine all supported sample rates:

$ cat /proc/asound/card1/stream0
...
  Interface 1
    Altset 1
    Format: S24_LE
    Channels: 2
    Endpoint: 0x05 (5 OUT) (ASYNC)
    Rates: 44100, 48000, 88200, 96000
    Data packet interval: 125 us
    Bits: 24
   ...

So our sound card supports a maximum sample rate of 24-bit, 96000Hz, (LE) Little Endian. What we want to do now is edit the ALSA config file to tell it to use this sample rate. We will also tell it to use a higher quality rate converter when playing sounds that are less than 96kHz. Open the file for editing:

$ sudo nano /etc/asound.conf

So for our example, we are card 1, device 0, S24_LE, and 96000. So you will want to add the following to your /etc/asound.conf file, changing the values to suit your sound card:

pcm.device{
        format S24_LE
        rate 96000
        type hw
        card 1
        device 0
        rate_converter "samplerate_best"
}

Save the file. It should take effect once you restart. You can confirm the changes using the following command:

$ pactl info
Making Firewalls Easier in Linux: UFW

In Linux, setting up a firewall traditionally meant a deep dive into iptables. Iptables is not known as being user friendly, and I used to avoid it whenever possible. There is a software in Debian and Ubuntu to make this much easier and less frustrating: UFW. UFW stands for “Uncomplicated FireWall”. This software allows you to configure iptables with ease.

Here are some instructions to install UFW on Debian-based distros.

$ sudo apt update
$ sudo apt install ufw

Edit the config file to enable IPV4 and/or IPV6.

$ sudo nano /etc/default/ufw

Make sure the following is included somewhere in your config file:

IPV6=yes
IPV4=yes

Save the file and exit your text editor. The default policy of UFW is set so that that the incoming traffic is not allowed and the outgoing traffic is allowed. It denies access to your computer by others, but your programs are allowed to connect to the outside world. The basic syntax to add rules to ufw is as follows:

$ sudo ufw default [policy] [chain]

As an example, the following command will deny access to your computer:

$ sudo ufw default deny incoming

To allow traffic out, use the following command:

$ sudo ufw default allow outgoing

To allow SSH connections into your machine, use the following:

$ sudo ufw allow ssh

Before you enable ufw, use the following command to check its’ status:

$ sudo ufw status verbose

Finally, to enable ufw, use the following command:

$ sudo ufw enable

Enable the GUI

There is also a GUI to make it even easier. To install it:

$ sudo apt install gufw
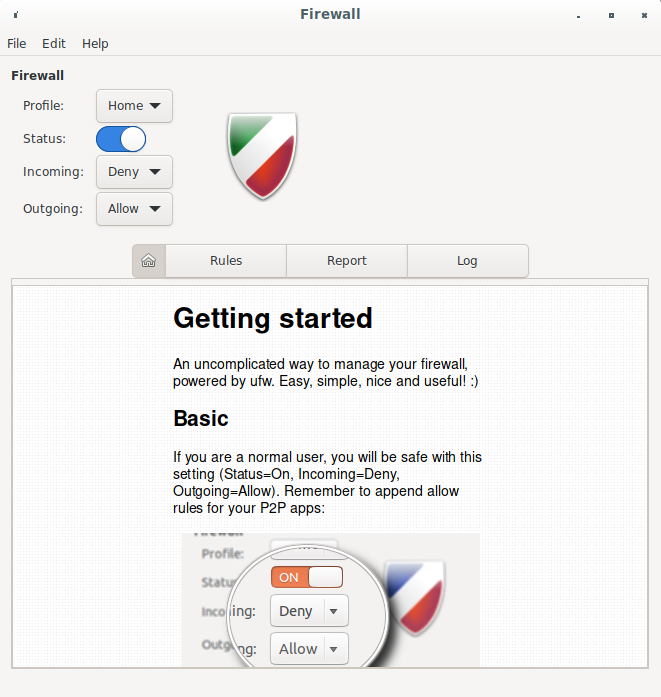
ufw gufw firewall user interface

Firewalls in linux don’t get any easier than this! 😀

NVIDIA Screen Tearing on Linux

I don’t know about everyone else, but I have had a serious problem with screen tearing using NVIDIA proprietary drivers on Linux. During videos and games, it looks like the top half of the screen has updated and the bottom half hasn’t updated, resulting in a visible line and “tearing” of the image.

I recently found an easy fix that has worked for me. If you have NVIDIA proprietary driver >= 365.20, the following fix should work for you. Open a terminal and type:

$ sudo nvidia-settings
  1. Click “X Server Display Configuration”.
  2. Click “Advanced…”
  3. Check the box that says “Force Full Composition Pipeline”.
  4. Click Apply.
  5. Click “Save to X Configuration File”.

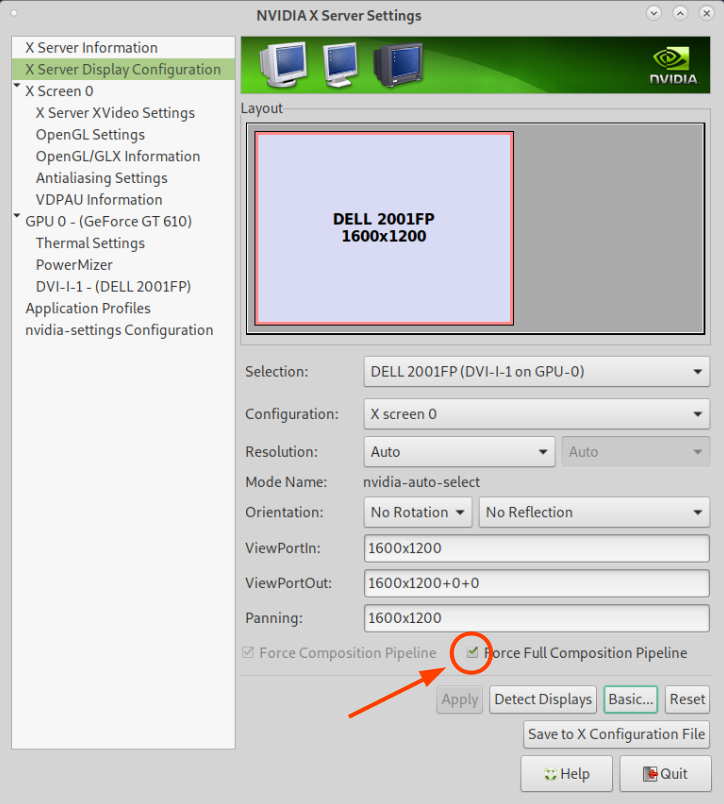
Save the file and you’re done! Here is a screenshot:

How To Edit MATE Desktop Main Menu

I love the MATE desktop environment and I use it every day. It is a continuation of GNOME 2. I recently found an easy way to edit the main menu. It is a package called Mozo.

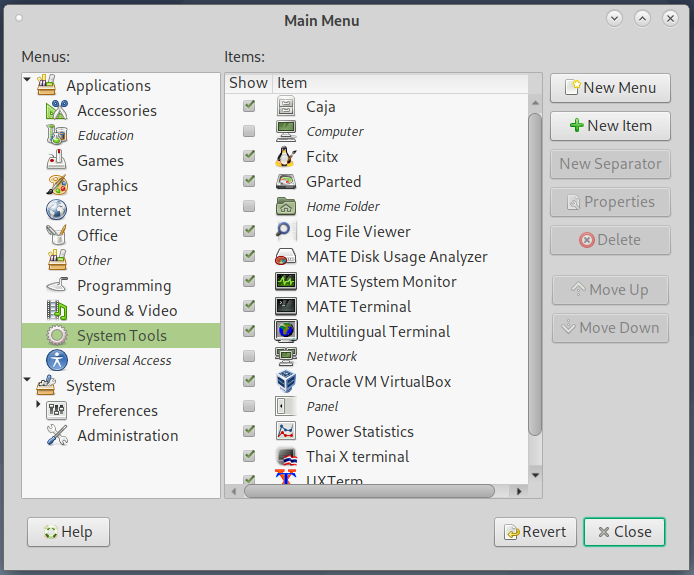
This is what it looks like:

MATE Mozo Screenshot

If you have MATE on a debian-based distro, you can install it using this command:

$ sudo apt install mozo